switek email

sales06@switek.biz

switek whatsapp

+86 186 5927 5869

Subscribe to Us

.

One Stop Robotic Arms for Injection Molding Machine Purchasing

SWITEK Robotic Arms for Injection Molding Machine Installation Instruction -- Chapter 12: Robotic Wiring
Abstract

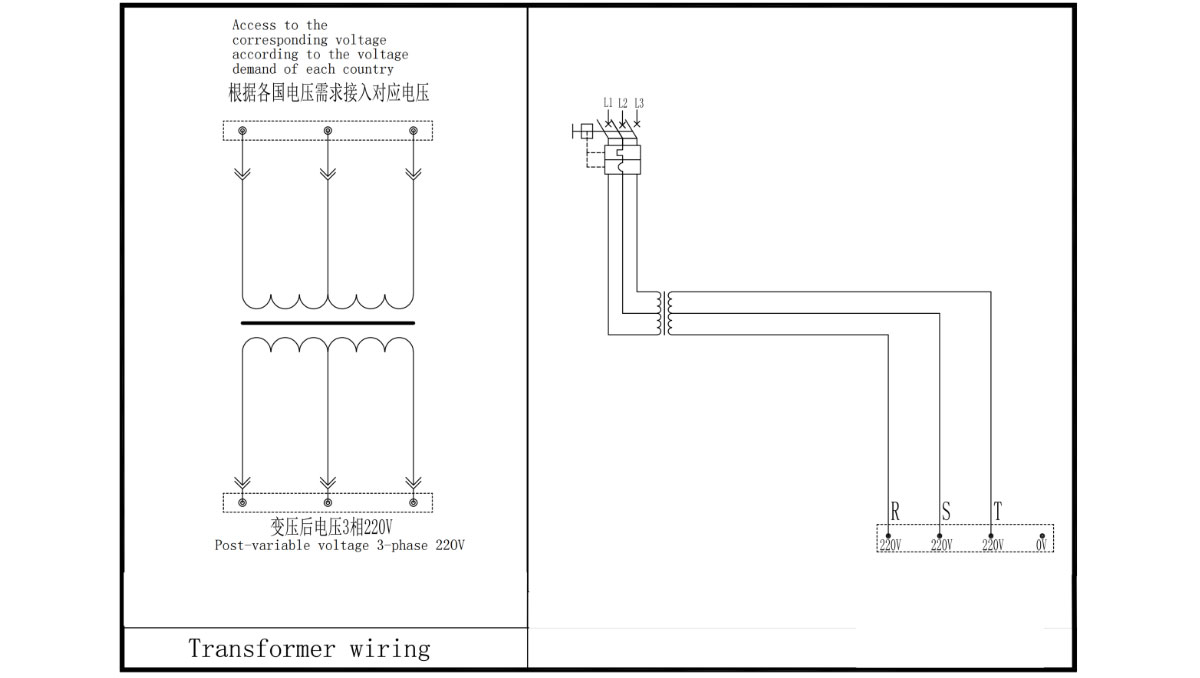
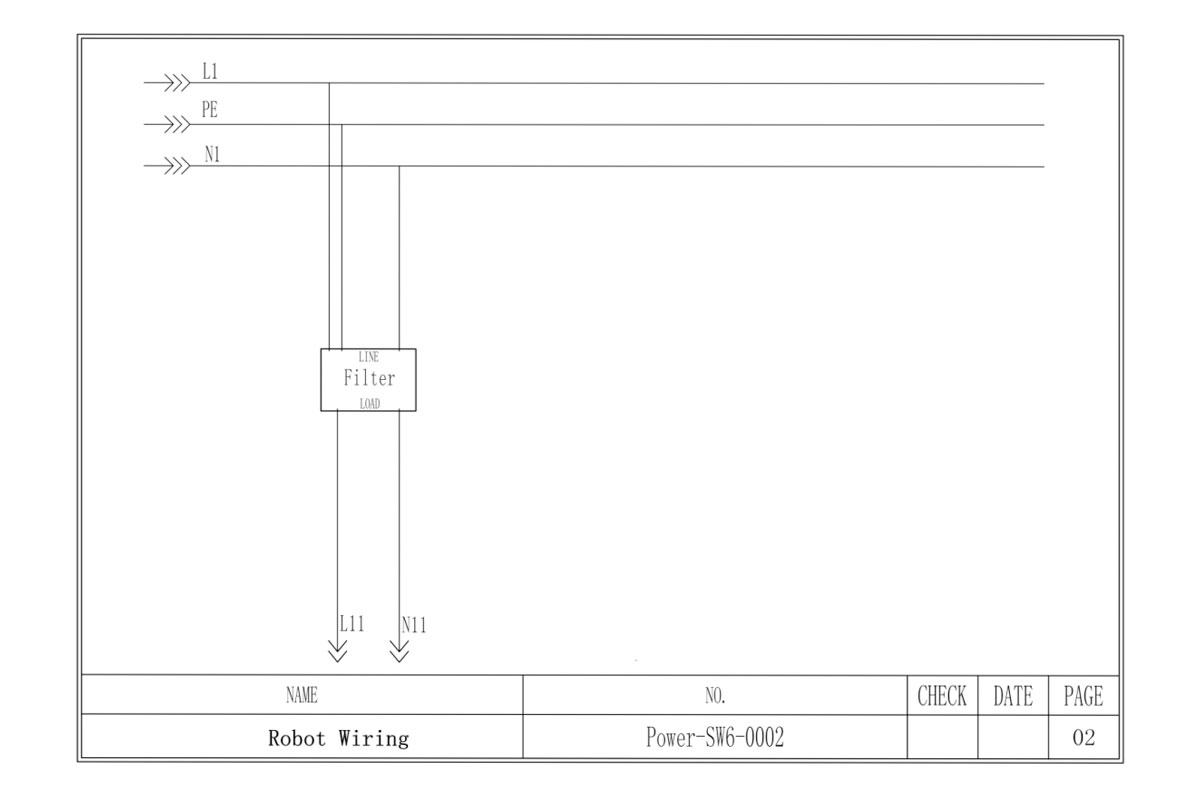
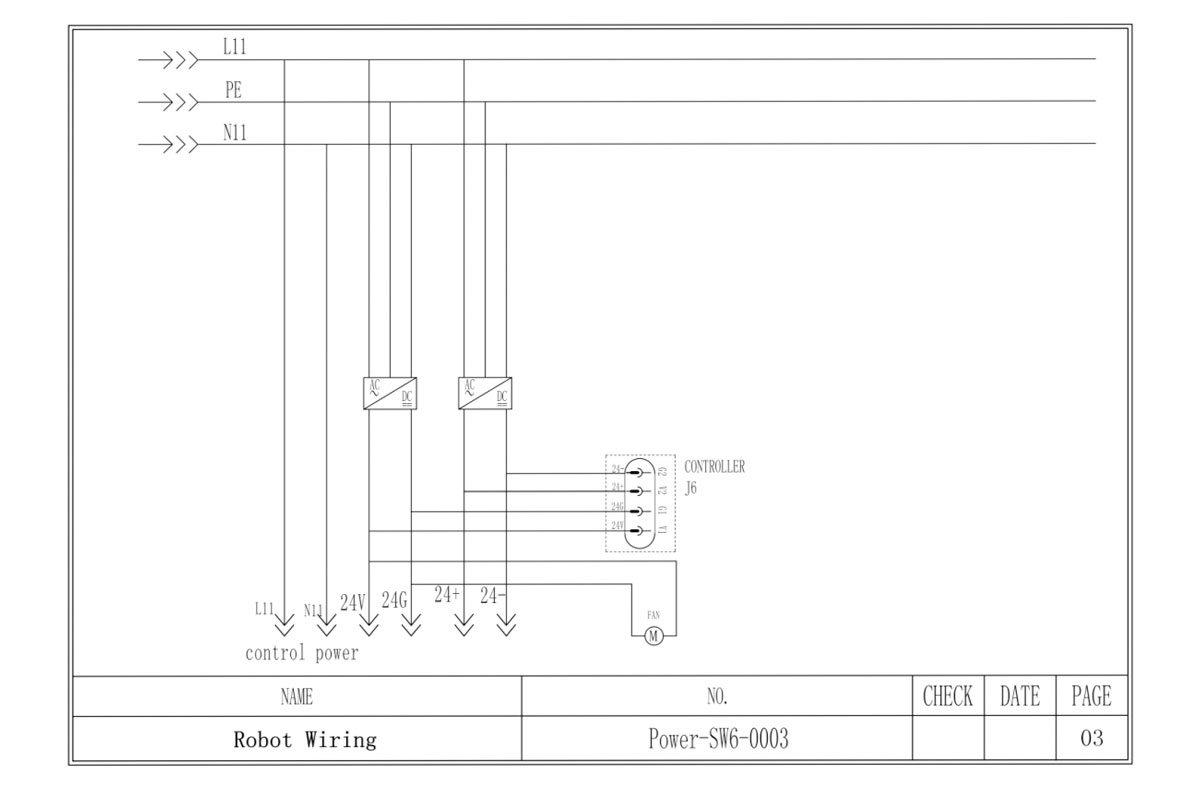
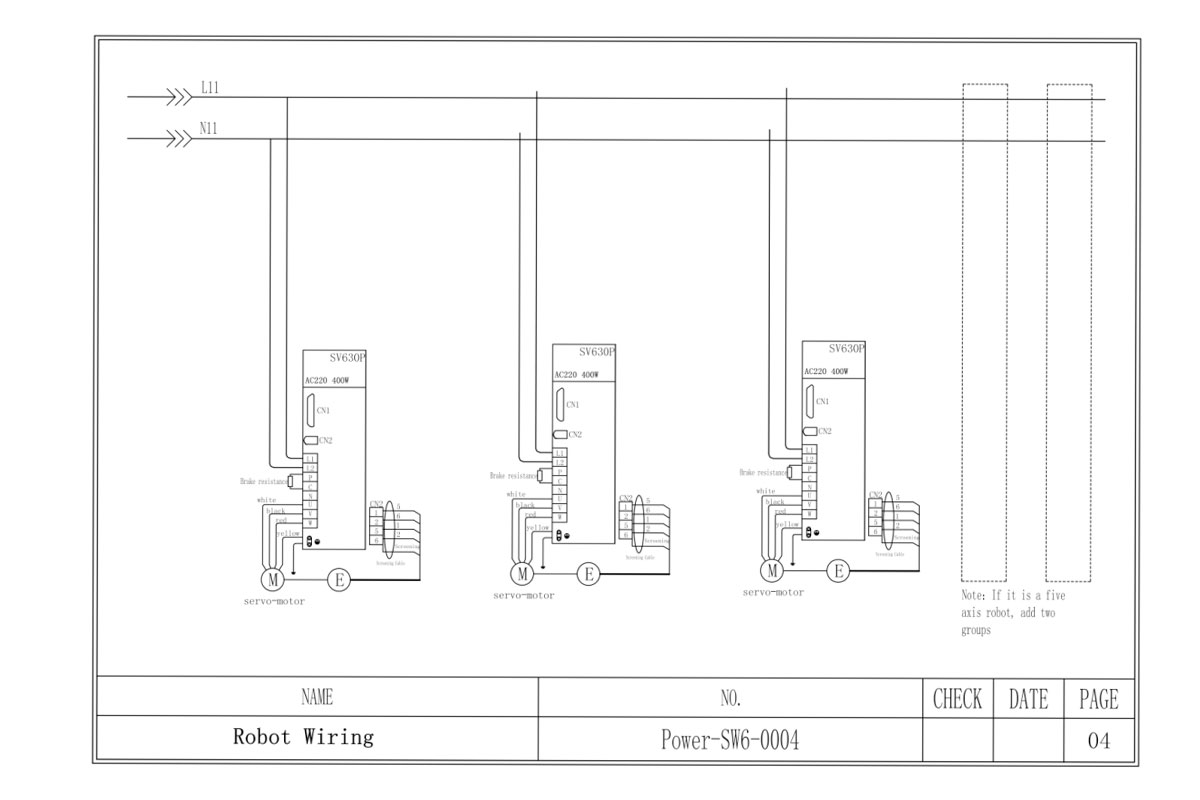
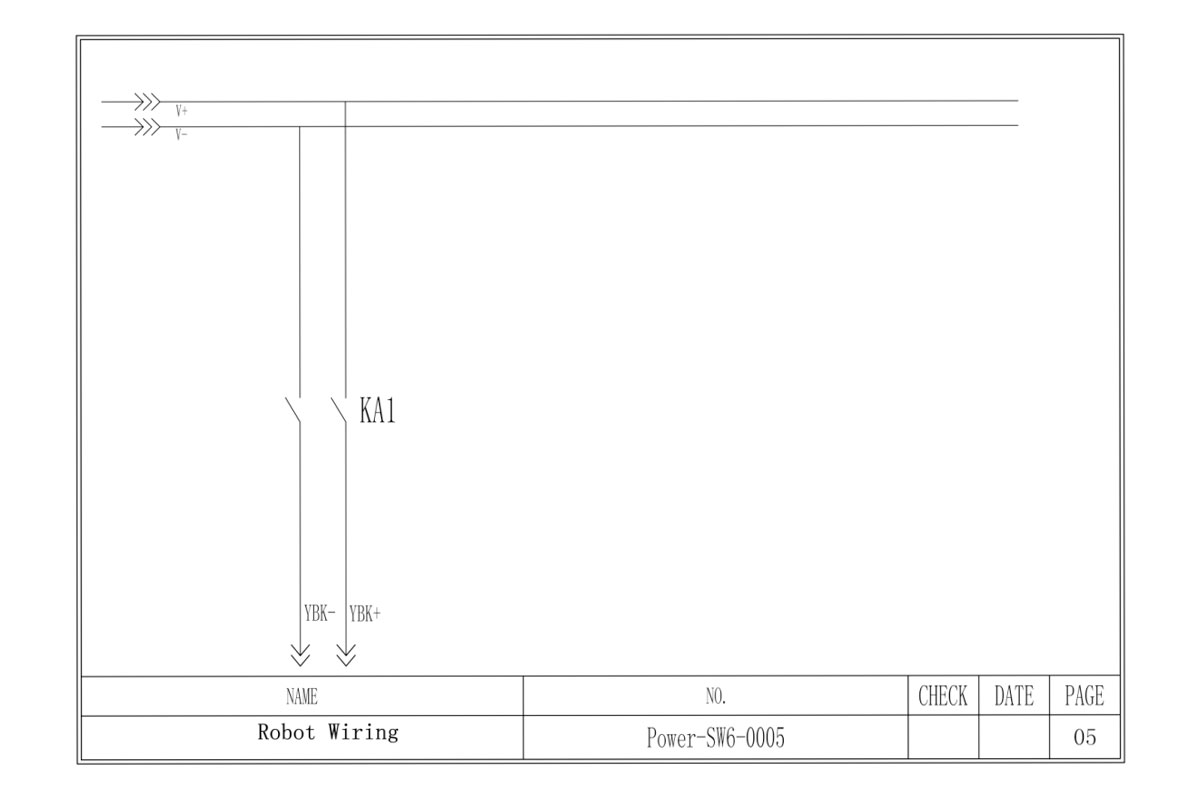
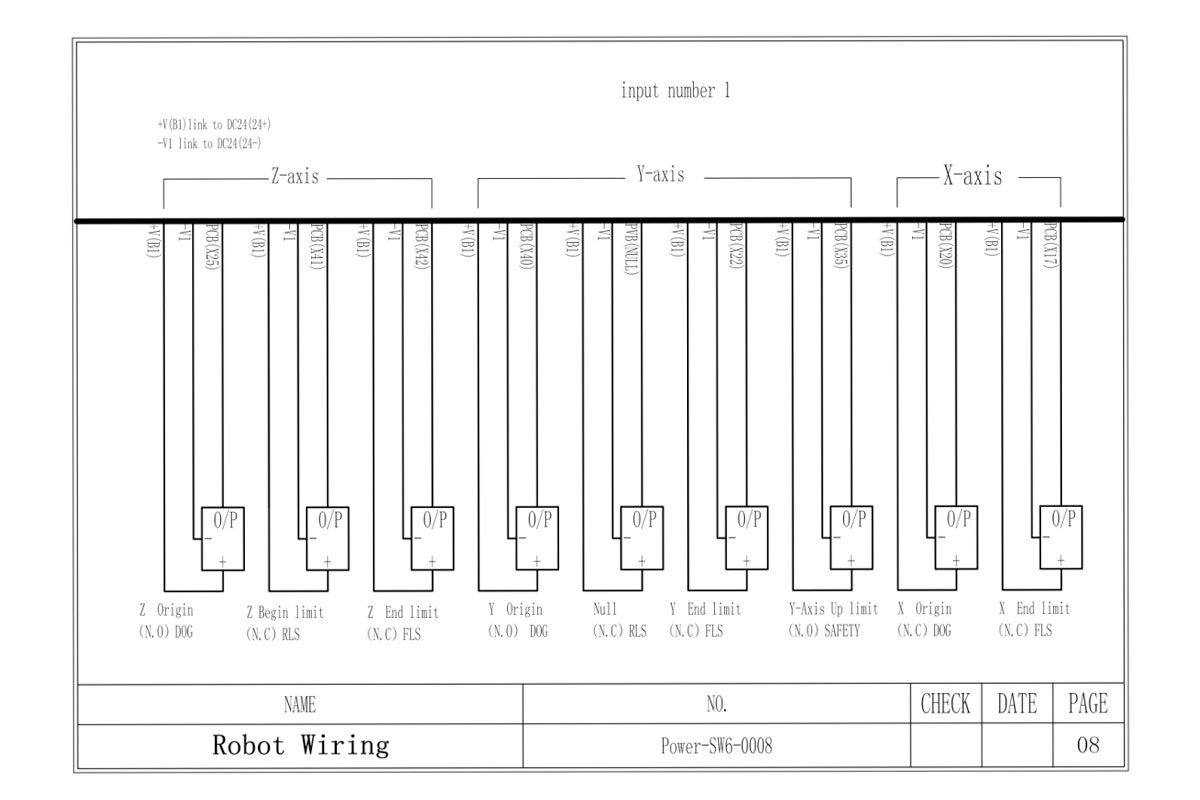
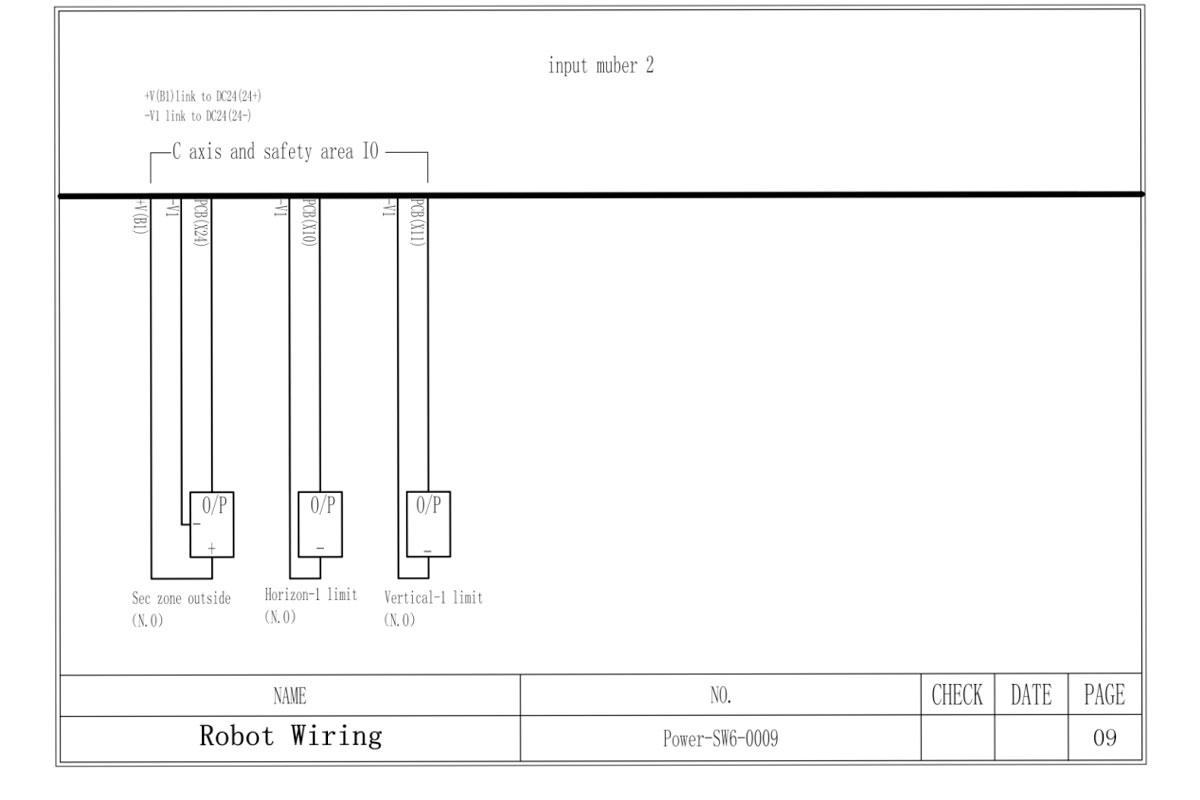
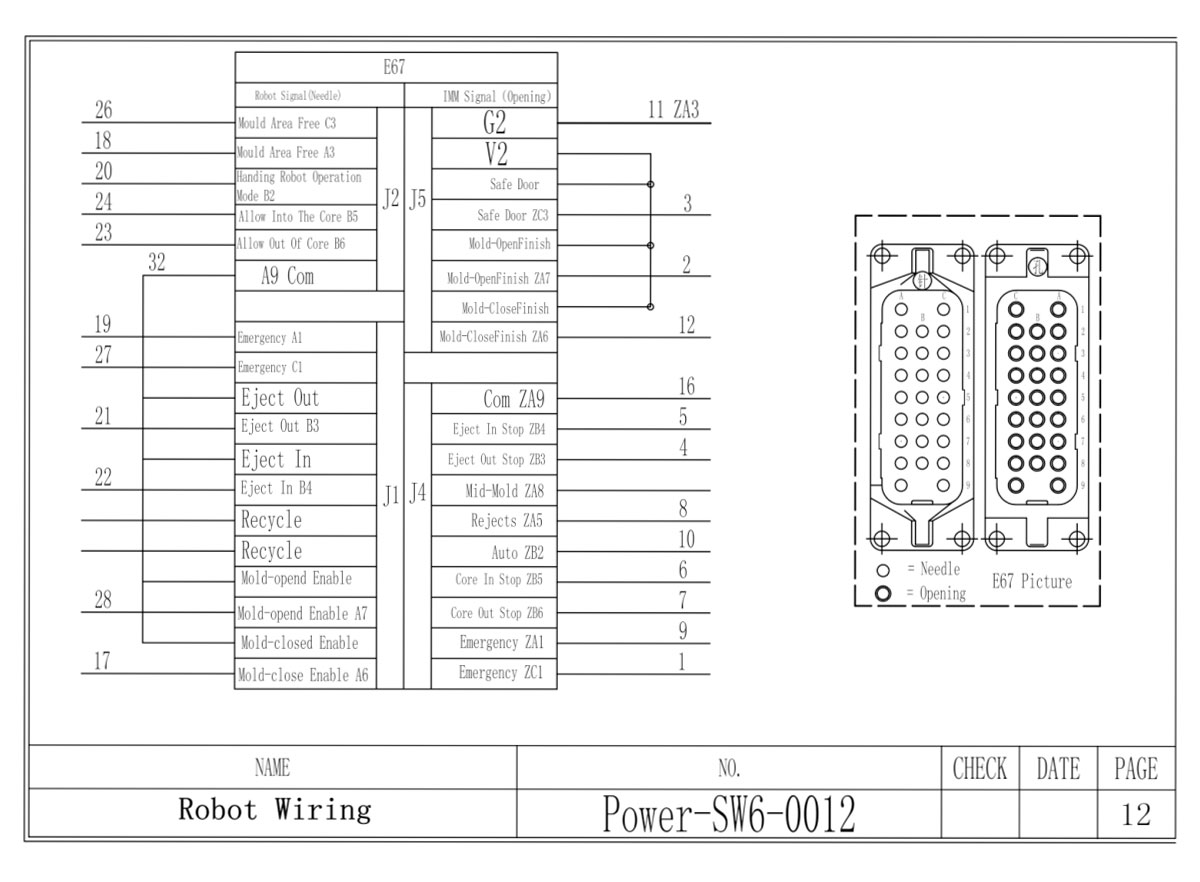
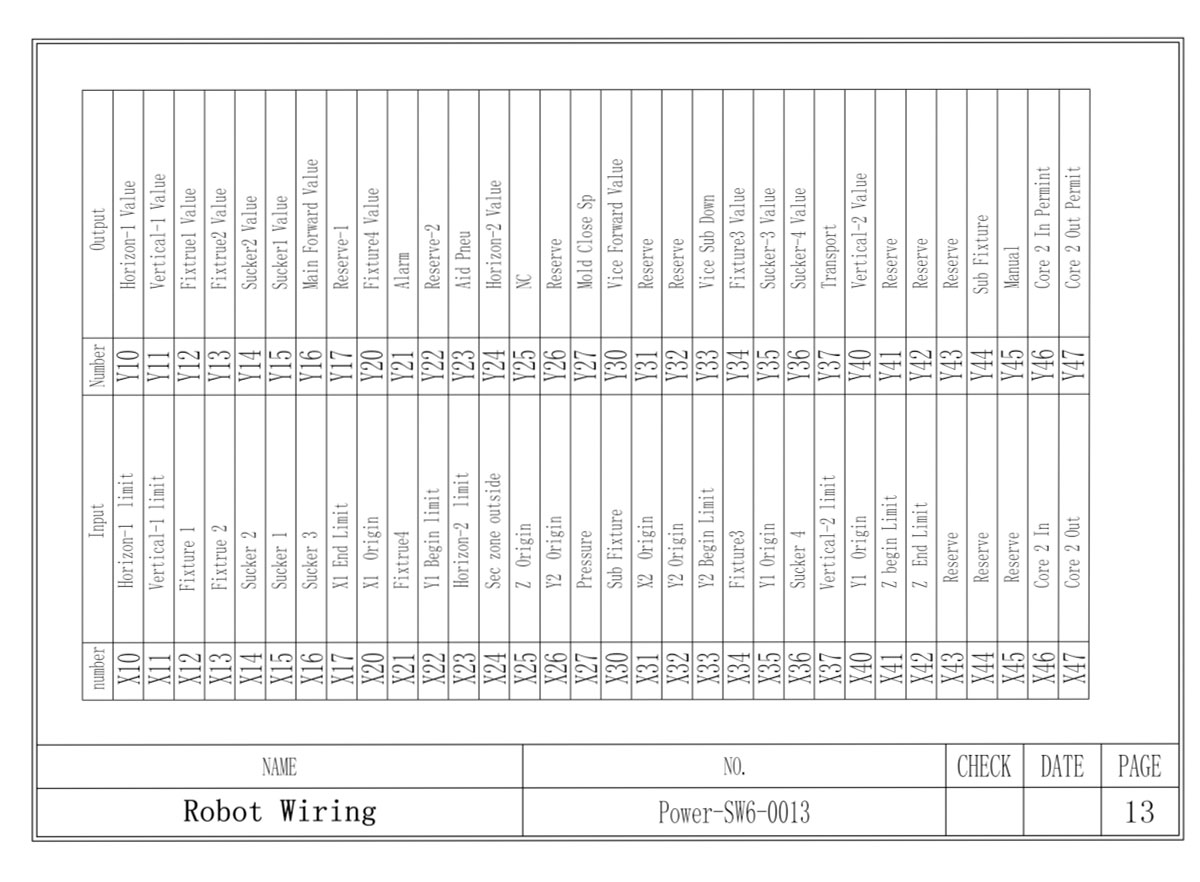
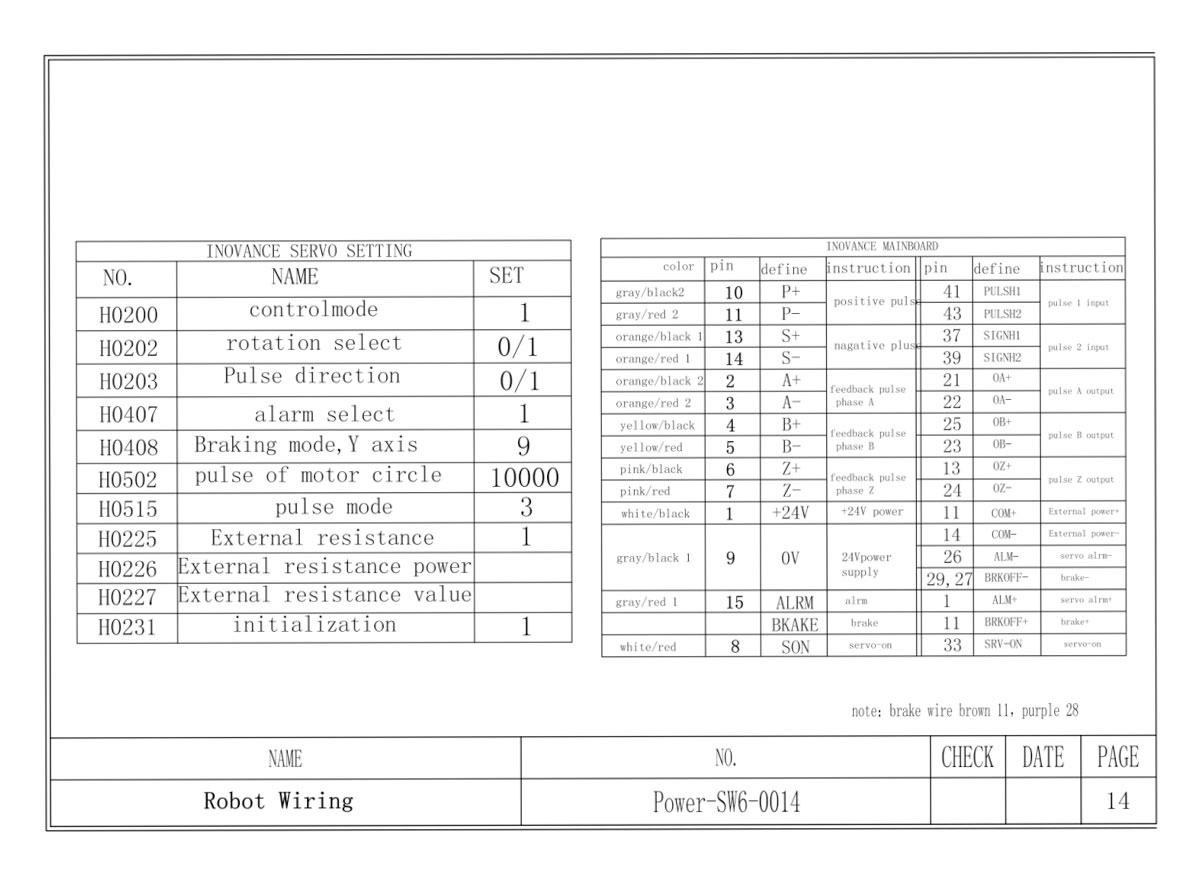
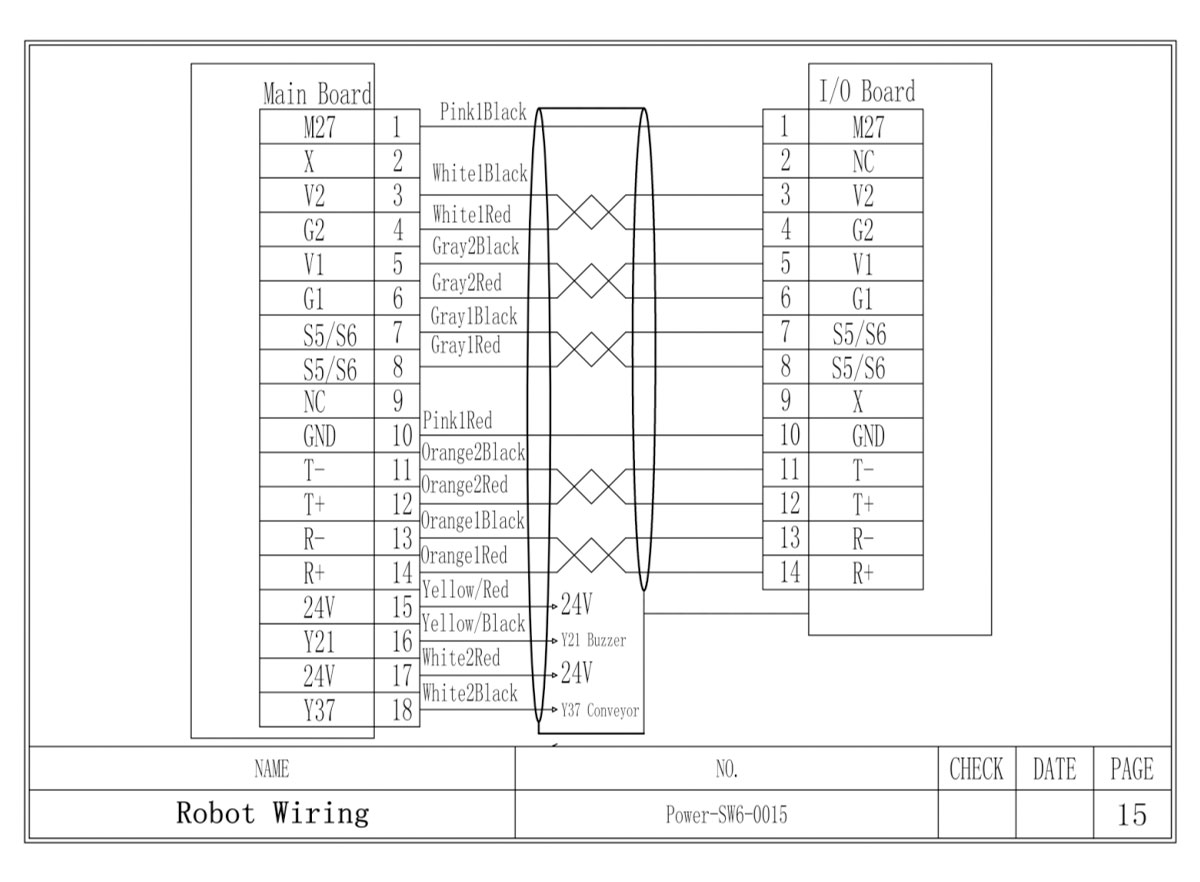
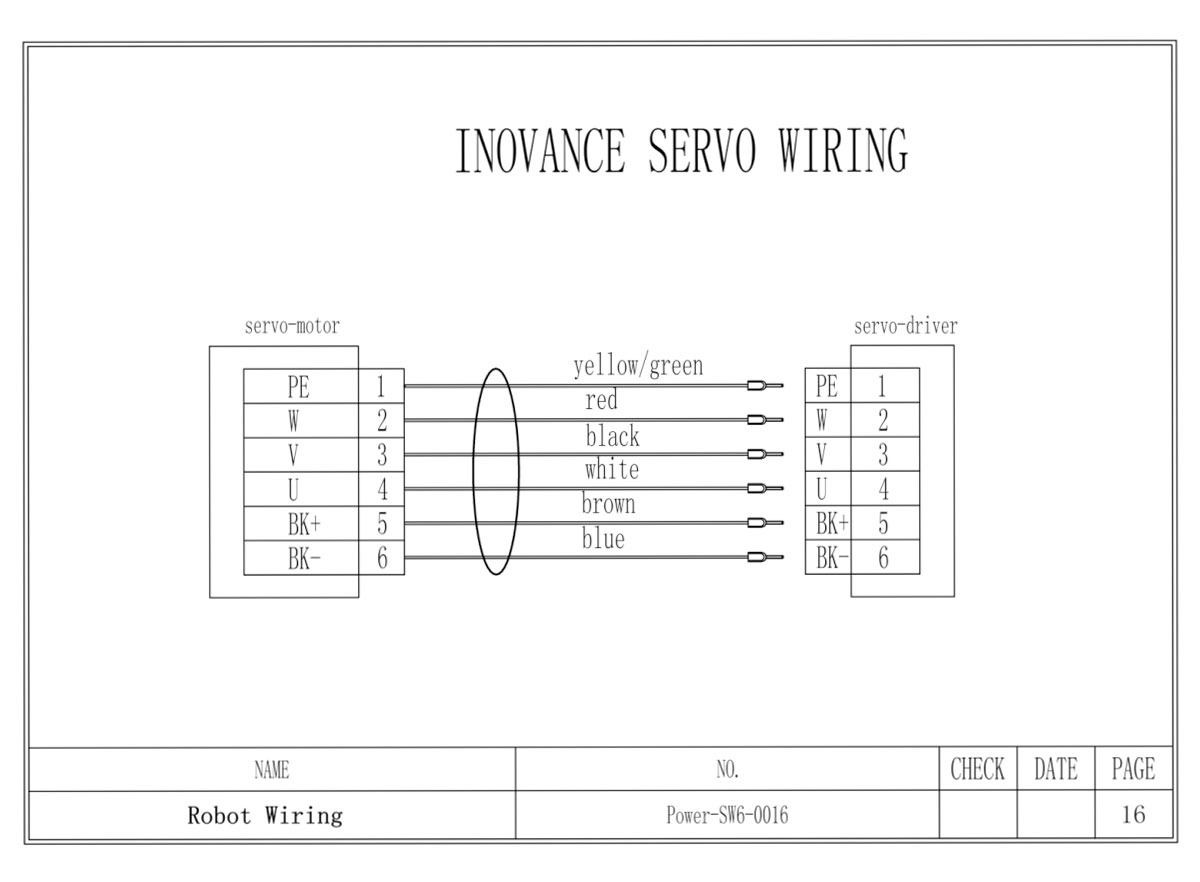
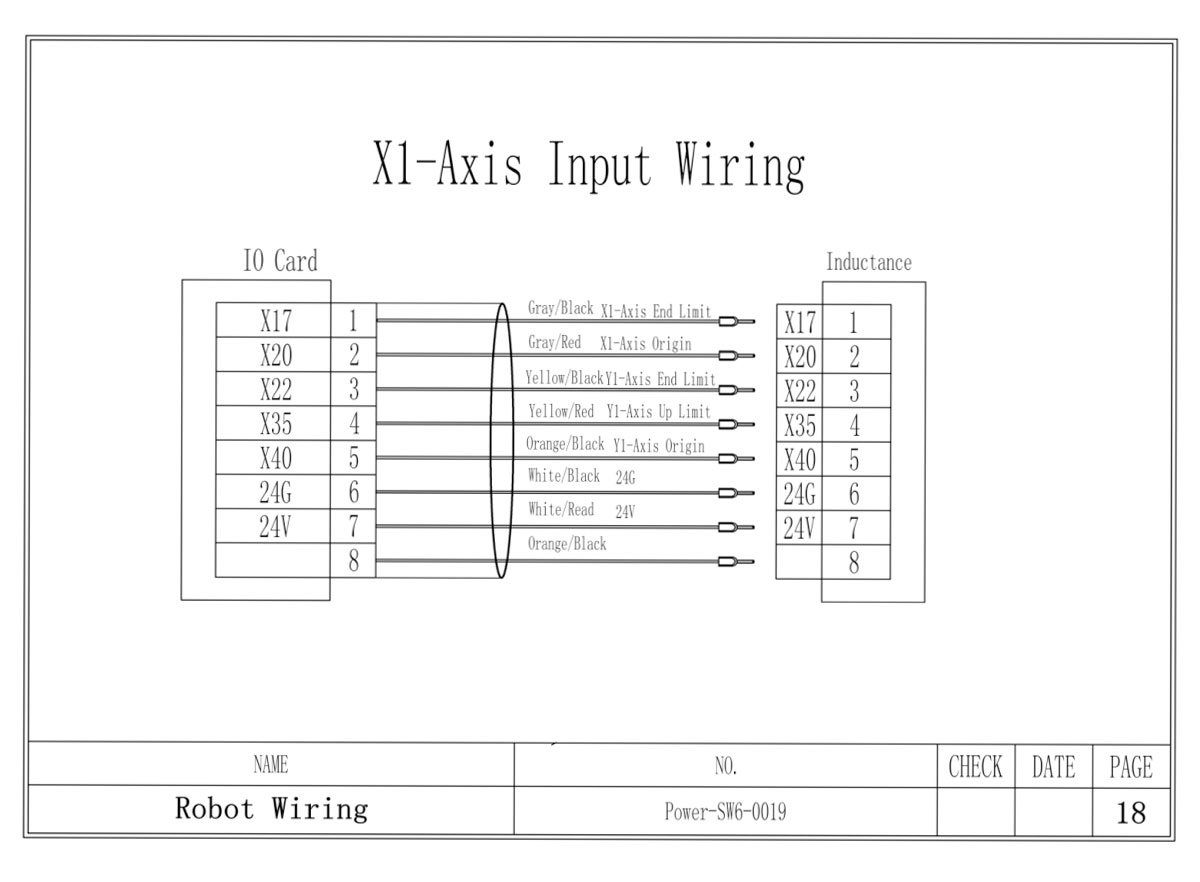
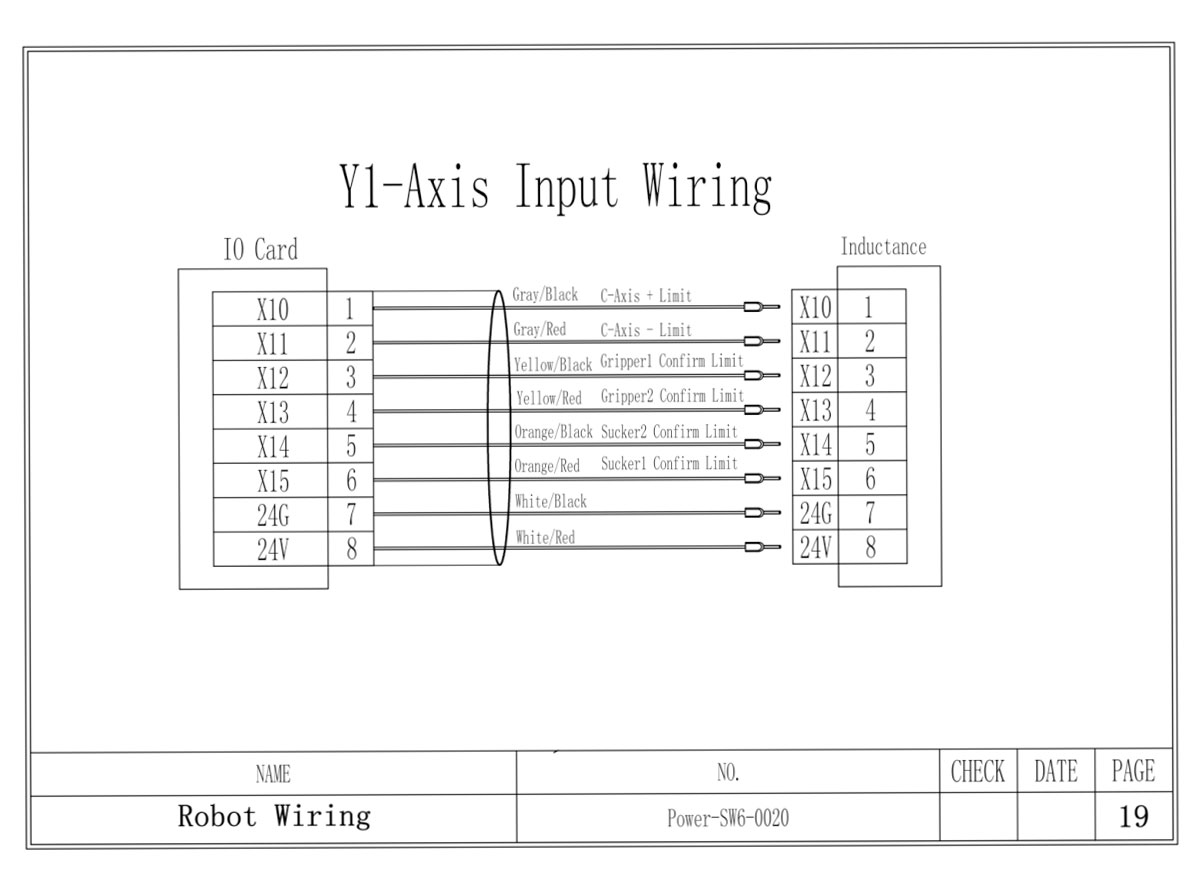
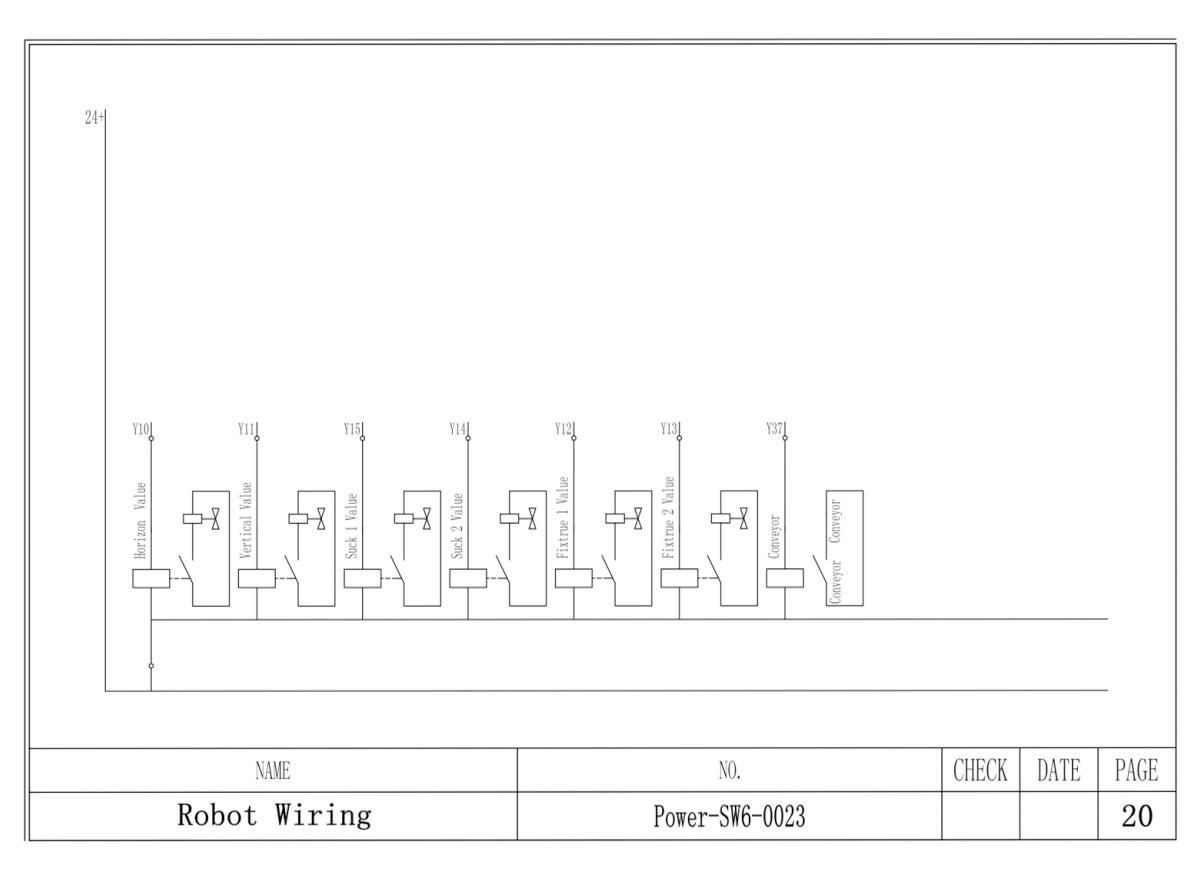
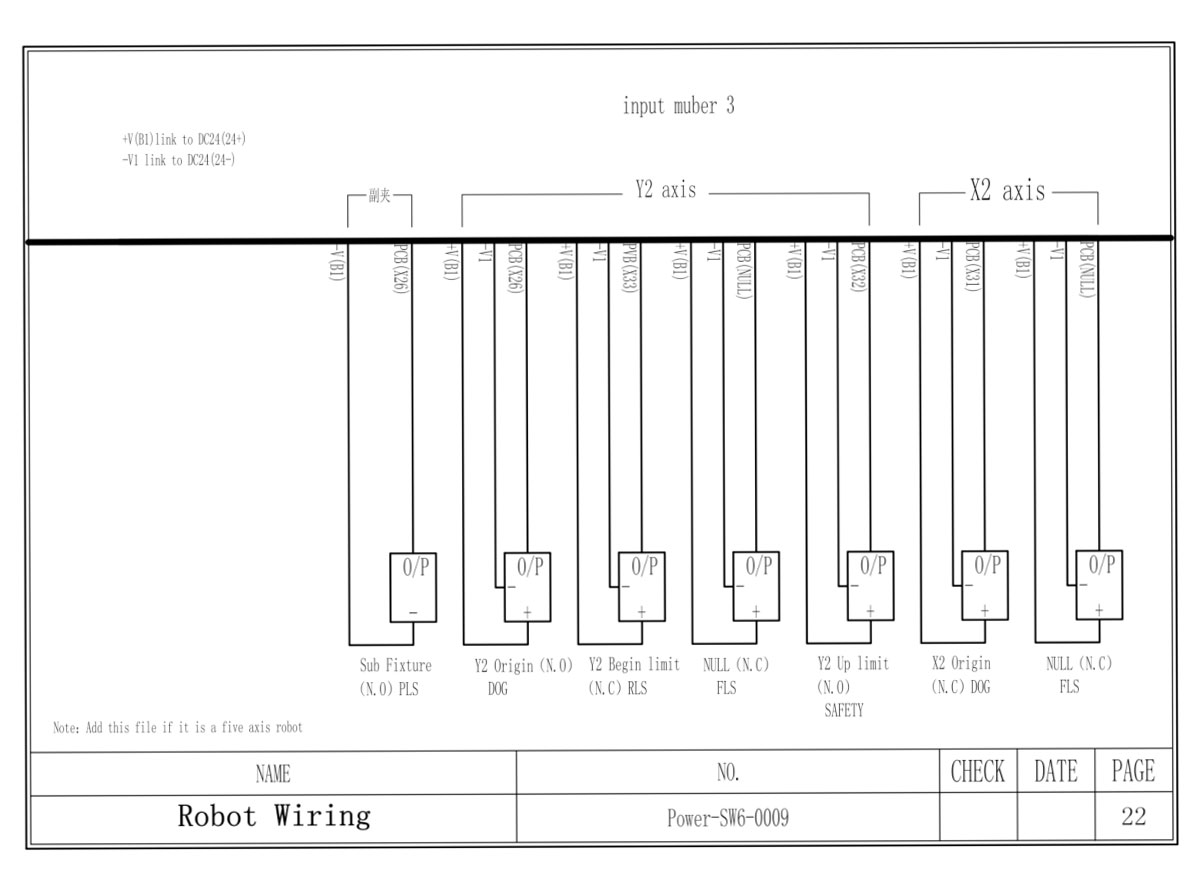
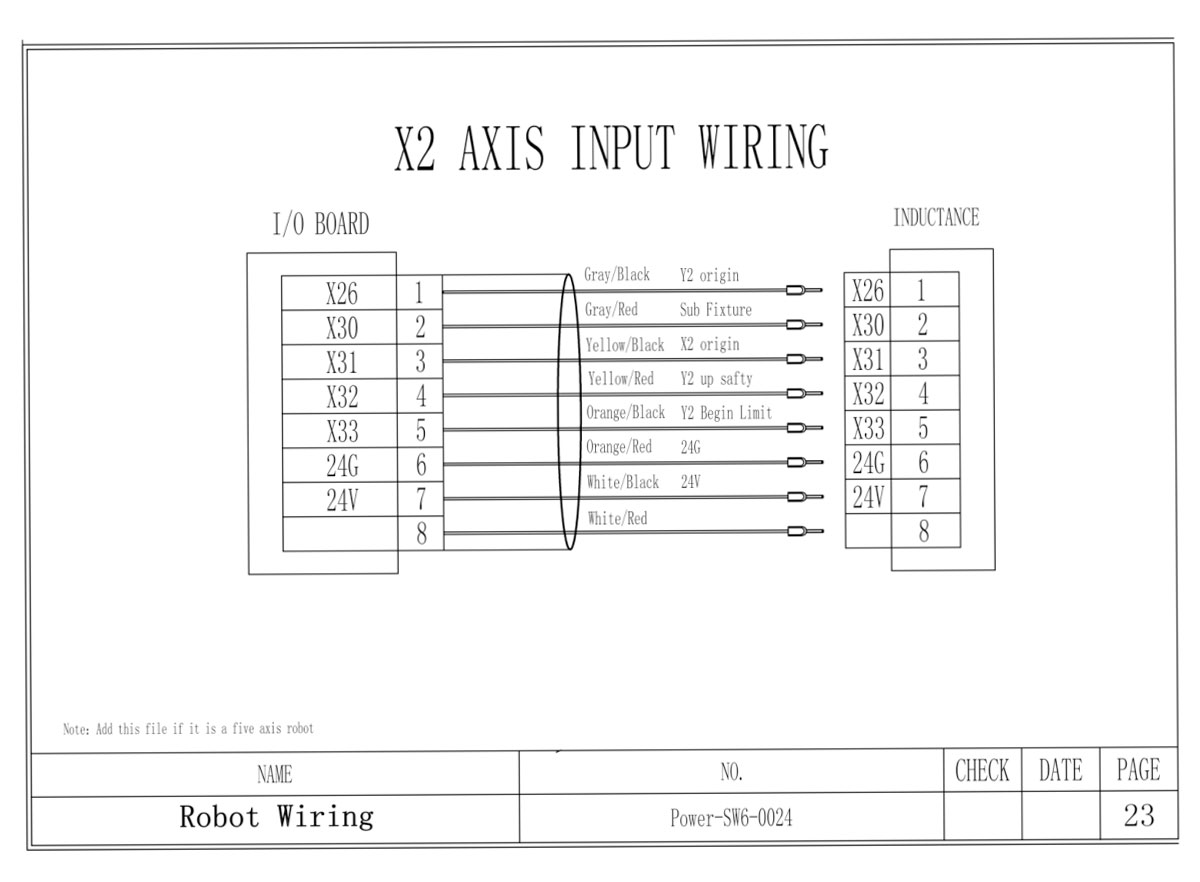
A minor mistake in the wiring of a robotic arm may lead to a disaster in production. Here you can find the detailed wiring diagrams for SWITEK 3/5 axis servo robotic arms for injection molding machine.

12.1 Switch-Power

robot installation

12.2 I/O Filter Power
robot installation
12.3 Main Board Power
robot installation
12.4 Servo Breake Power
robot installation
12.5 Servo-Motor Power
robot installation
12.6 IO Board
robot installation
12.7 Main Board Wiring
robot installation
12.8 Input Number 1
robot installation
12.9 Input Number 2
robot installation
12.10 Wiring Instruction of Chinese Standard IMM Interface
robot installation

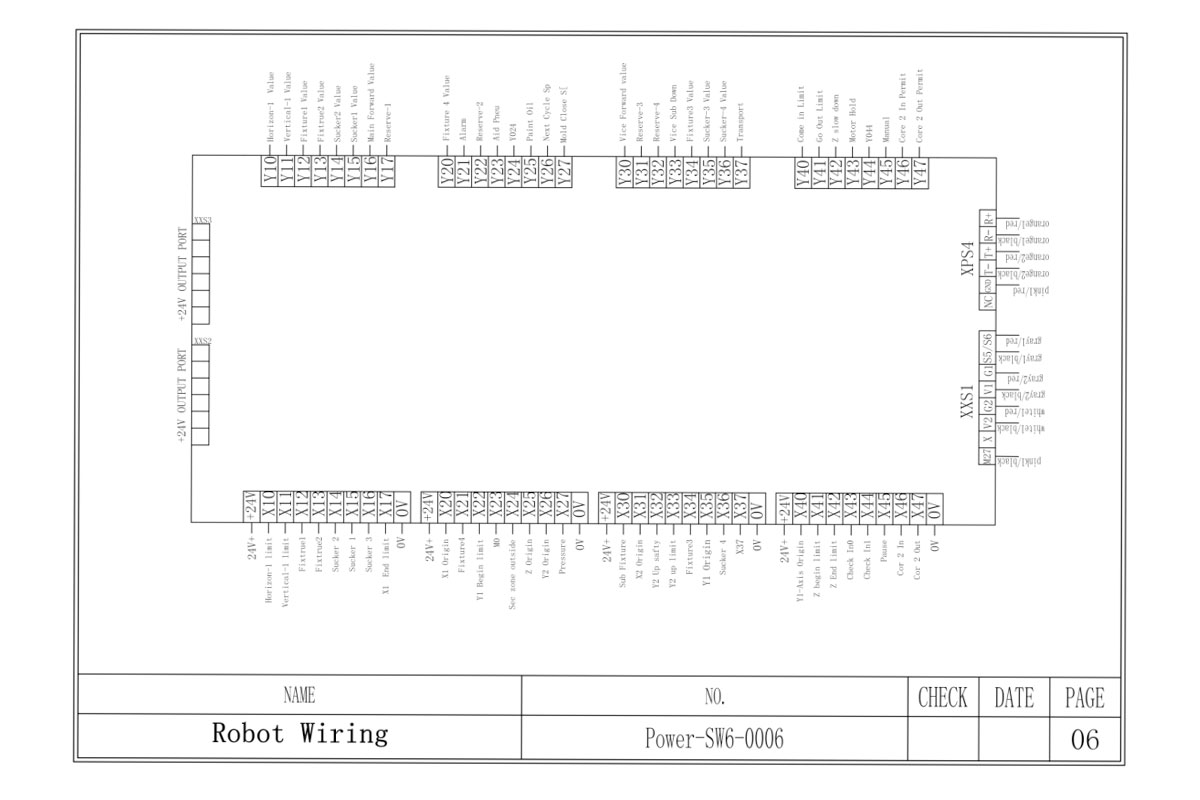
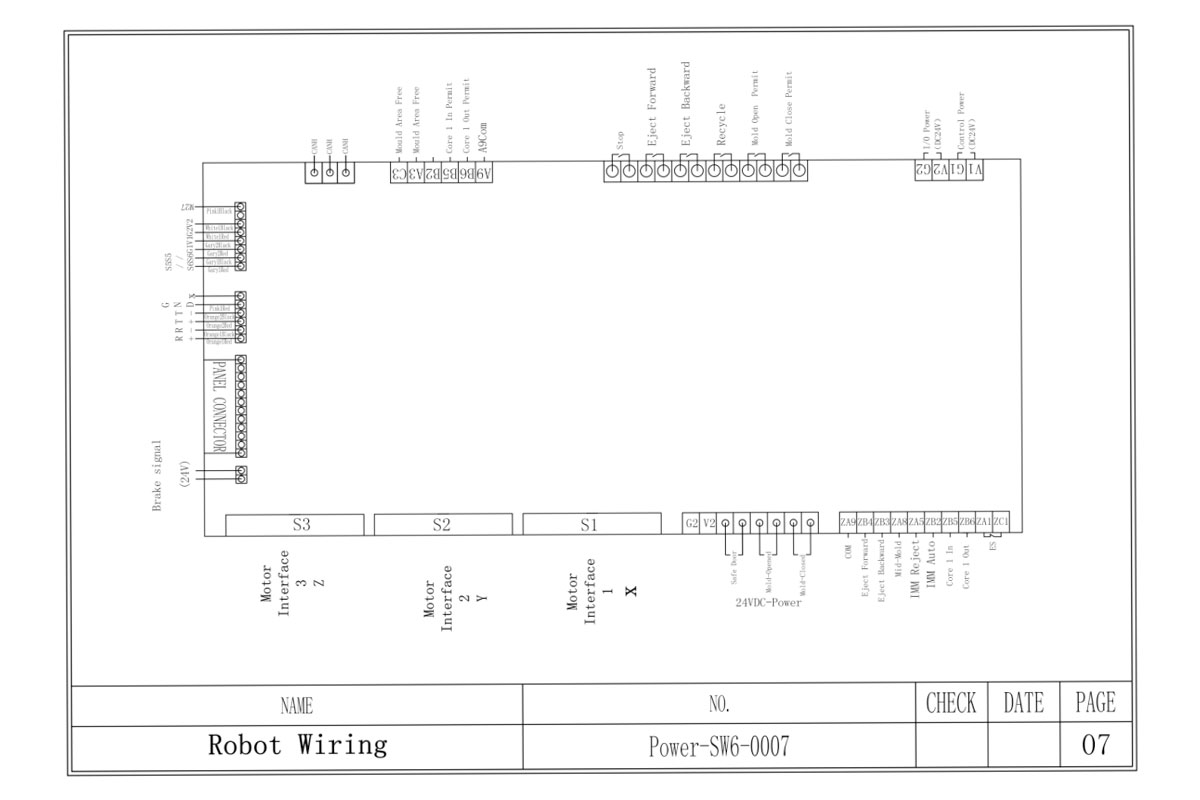
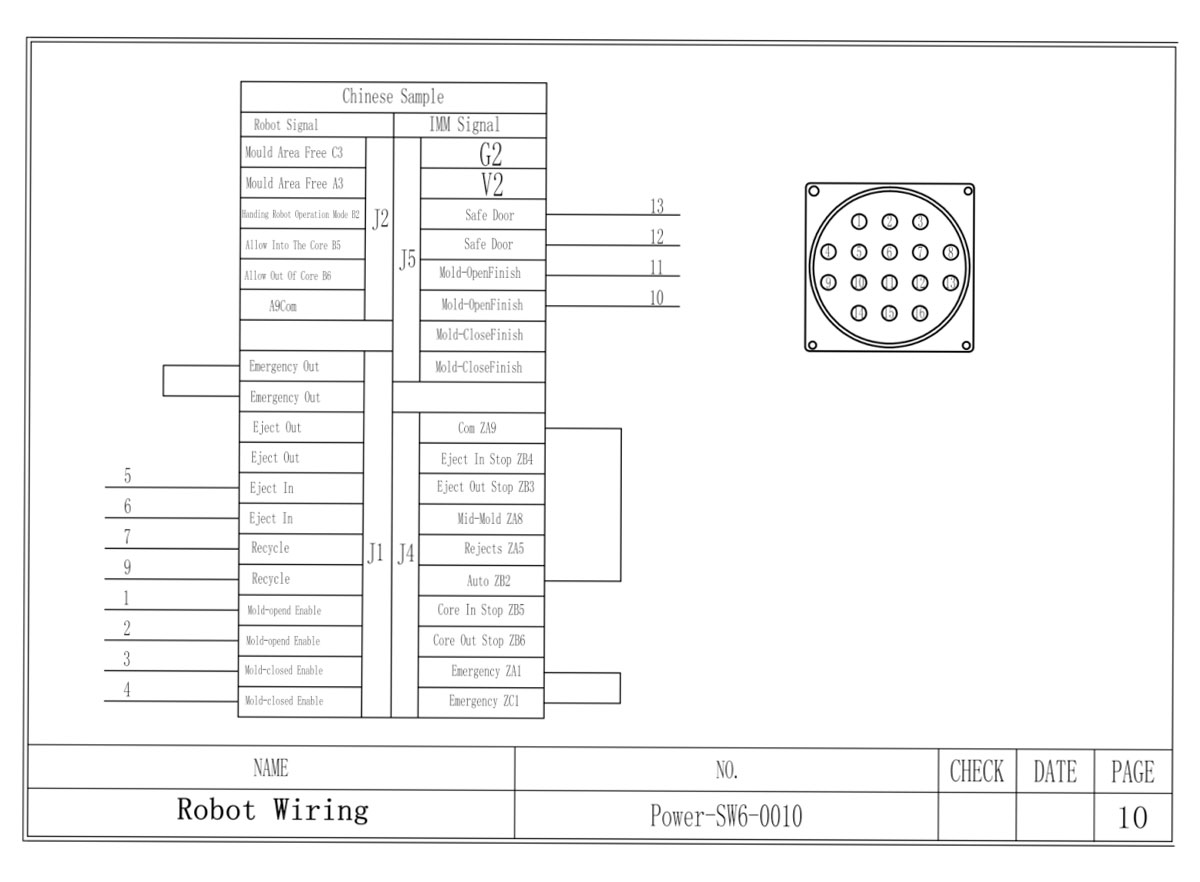
Remark: The JIT interface is very popular among the Chinese and Japanese injection molding machine makers for it's low cost and easy wiring. For most of the Chinese injection molding machine makers the JIT interface would be a standard option and EU12/EU67 interface would be an optional solution with extra charge.

12.11 EU12
robot installation
12.12 EU67
robot installation
12.13 IO Collect
robot installation
12.14 Servo and Main Board
robot installation
12.15 Main Board and IO Board Drawing
robot installation
12.16 Servo-Motor Wiring
robot installation
12.17 Servo-Coder Wiring
robot installation
12.18 X1-Axis Input Wiring
robot installation
12.19 Y1-Axis Input Wiring
robot installation
12.20 Electoromagnetic Valve Drawing
robot installation
12.21 Extended E67
robot installation
12.22 Five Axis Robot Add File 1
robot installation
12.23 Five Axis Robot Add File
robot installation

HCS3S5 Operating Instruction

E-mail:sales06@switek.biz

WhatsApp

WeChat


You May Also Be Interested
Send Us An Inquiry Now
Submit