SWITEK Robotic Arms for Injection Molding Machine Installation Instruction -- Chapter 6: Record Management
Abstract
The SWITEK 3/5 axis servo robotic arm is capable of recording more than 100 programs for different mould design. Here in this chapter we'll show you how to create a new program, backup an existing program and reload the program from a USB key and how will the robotic arm react to the program etc.
6.1 Create and Load Program
On the stop status and then click the record button on the menu bar to go into the record management page. You can maintain your programs in this page. As shown below:
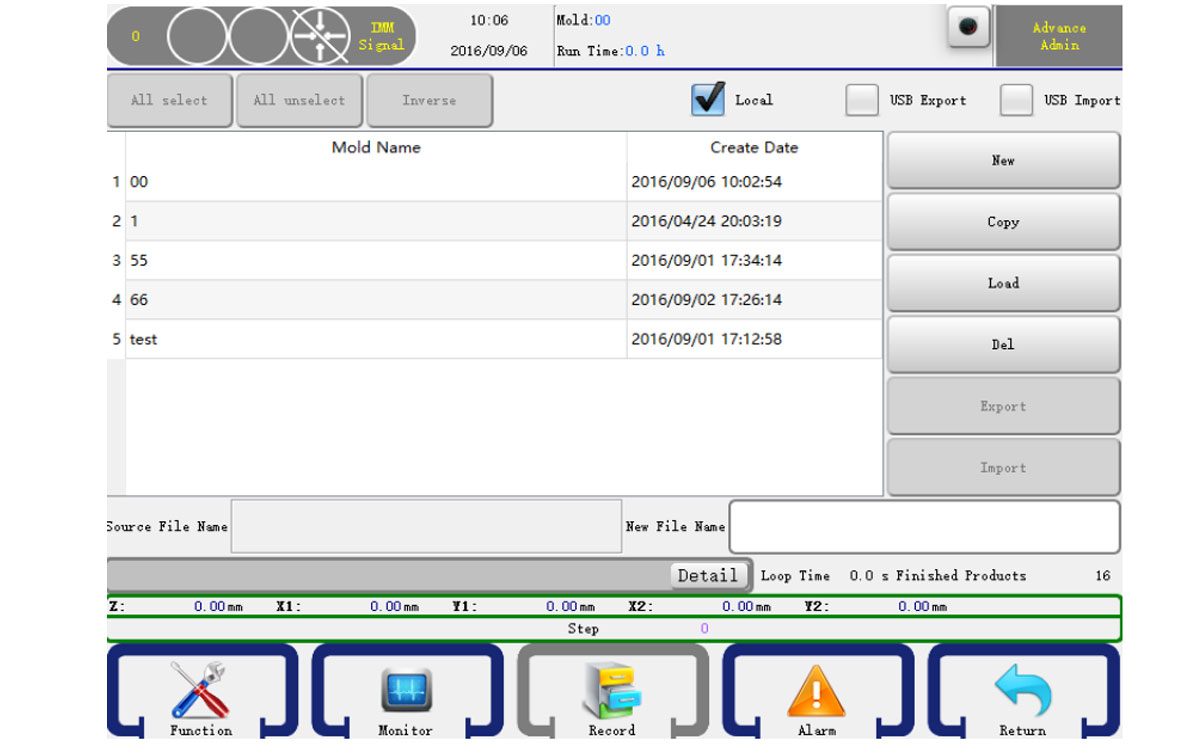
- Create Program: Input a program name in the file name box and then click the new button to create a new program.
- Copy Program: Input a program name in the file name box and then click the copy button to copy a program to a new program.
- Load Program: Select a program and then click the load button to load a program.
- Delete Program: Select a program and then click the delete button to delete a program. The current used program can not be deleted.
- Export Program: Select a program and then click the export button to back up the program to an USB Key.
6.2 Program Instruct
Turn the knob to the left to go into manual status and then click the teach button on the main menu bar to open the program editor. As shown below:
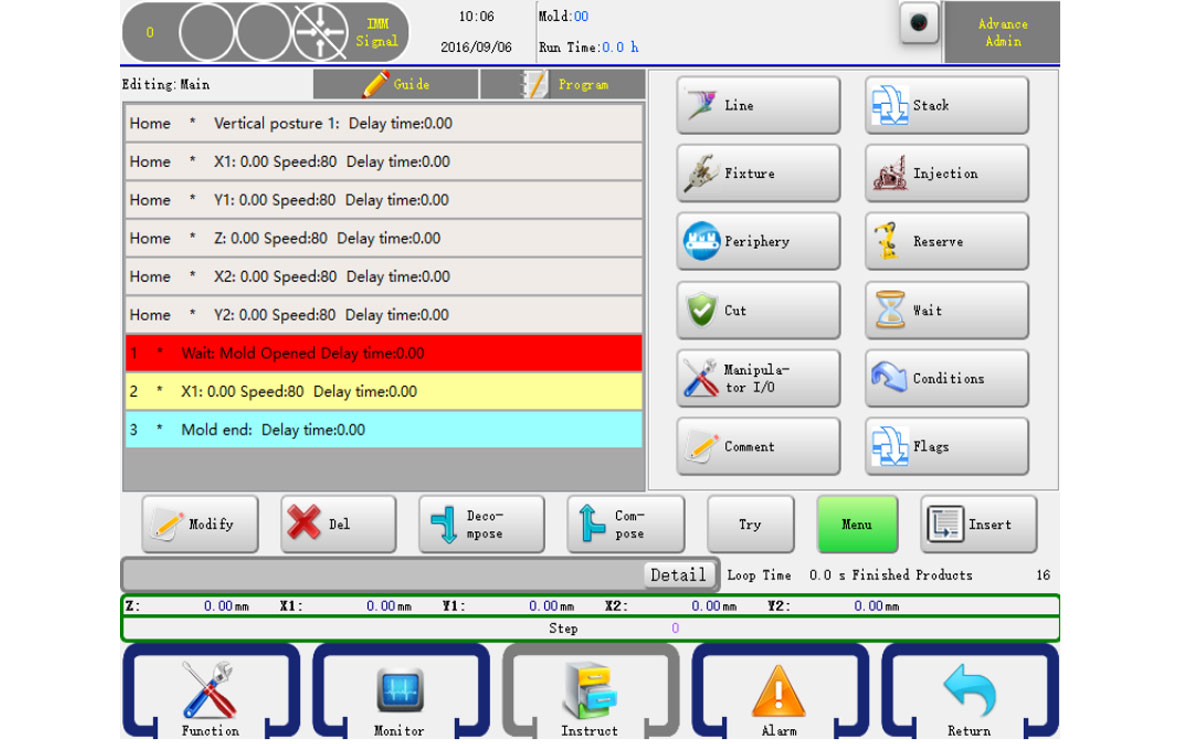
Servo action, Stack action, Fixture action, Injection, Auxiliary action, Reserve action, Check action, Wait action, Series action, Periphery are included in "Instruct" button. Clicking these buttons to edit a progremm. Press "Instruct" to back to menu.
In instruct mode, after selecting the actions you want to combine with, click "Combination" and you will get a same action step which is working at the same time when Auto operation. You can also seperate a combined step into sereral steps by pressing "Break" button.
6.2.1 Servo Action
Click the Line button to go into servo action editor, you can set the X1(X2), Y1(Y2), Z, C(Posture) axis status, as shown below:
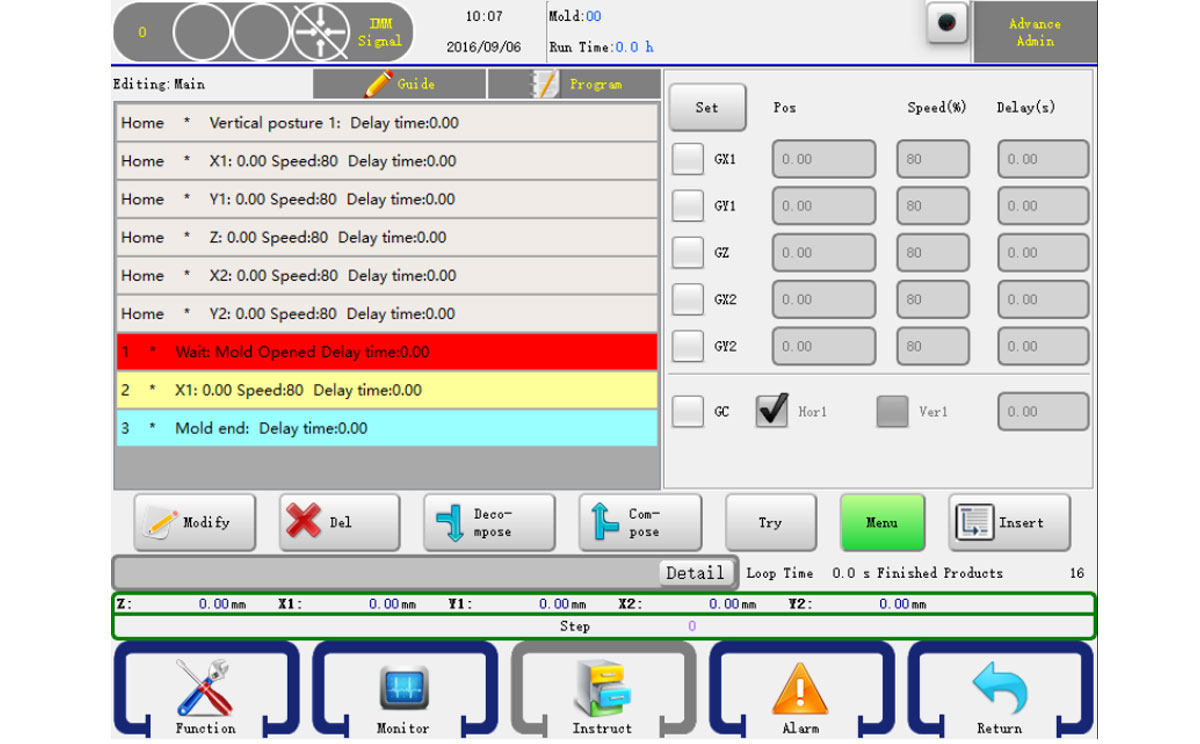
In this page, you can set X1(X2), Y1(Y2), Z axis' position, operating speed and delay time. After clicking the icon √ comes on the left, then set up the parameters of axes, select and click "Insert" button so that the corresponding settings are confirmed and inserted into the program steps.
There are two ways to set the axis position:
- Input the position you wanted in the editor box.
- Press the axis button on the keyboard to move the arm to the position you wanted and then click the set button.
6.2.2 Program Starting Point
The six steps are shown as six axes' origin position and pose
Six stpes of [Home] status above, which are default steps status in a new program, can just be edited by click "Edit" to modify the stating position, operating speed and delay time of axes, not be deleted.
6.2.3 Stack Action
Click the Stack button to go into the stact action editor, as shown below:
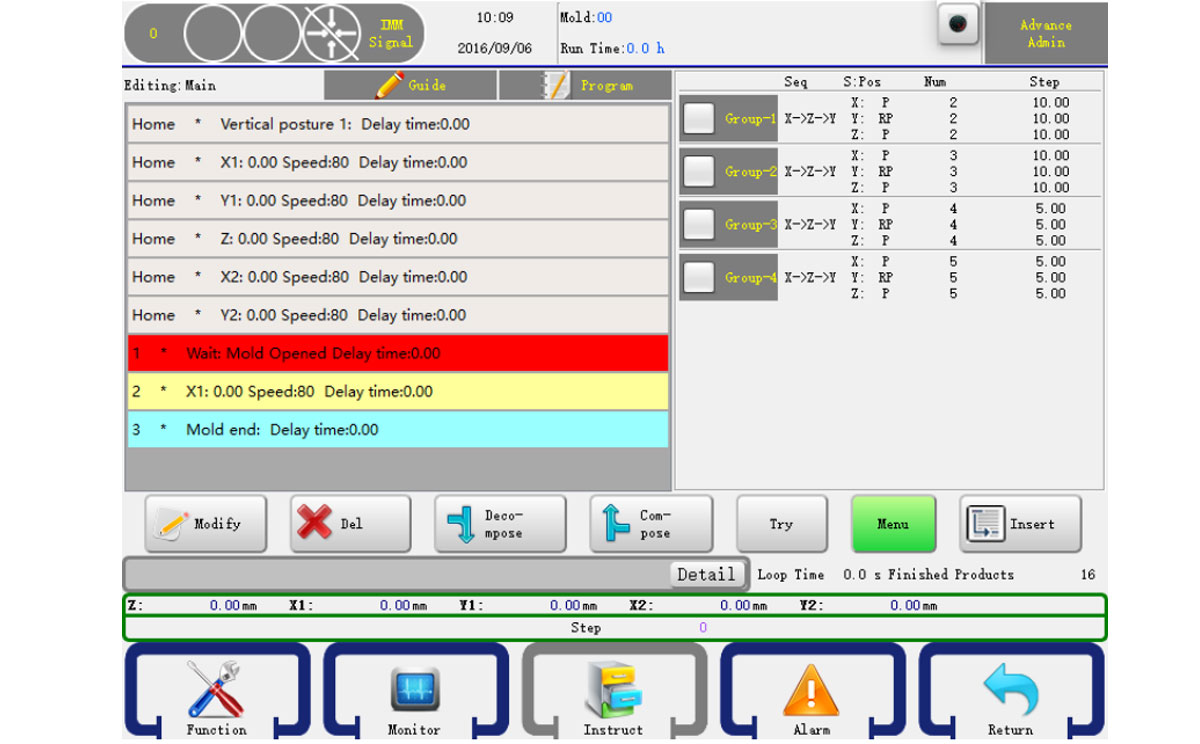
Select the left side of the stack to insert the program group, set the group and then click insert button in front of the stacking step. The robot will stack products as order when Auto operation.
If you want to use the Y axis to stack, you should make sure the stack is inserted before Y-axis is lowering operation.
6.2.4 Fixture Action
Click the Fixture button to go into fixture and sucker action editor, as shown below:
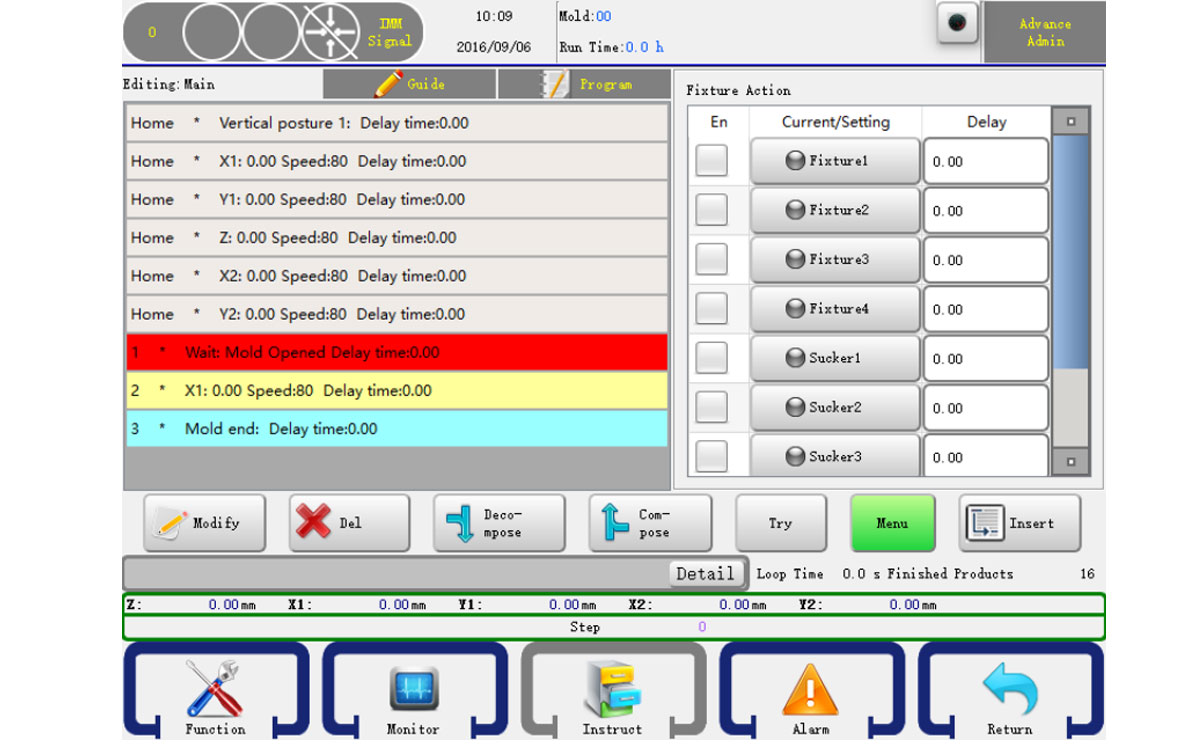
The controller can set four fixtures and two sucker action, clicking the button to be controlled and the indicator turns red when output.Then click on the left so that it becomes √, clicking "Insert" the action step is inserted into the front steps of the selection procedure.
After inserting fixture and sucker action, be sure to insert Check action, or the program does not test their conformation signal. If you do not acknowledge signal, you won't need the Check action. But anyway you'd better have Check action to protect machine.
6.2.5 IMM Action
Click the Injection button to go into injection action editor, as shown below:
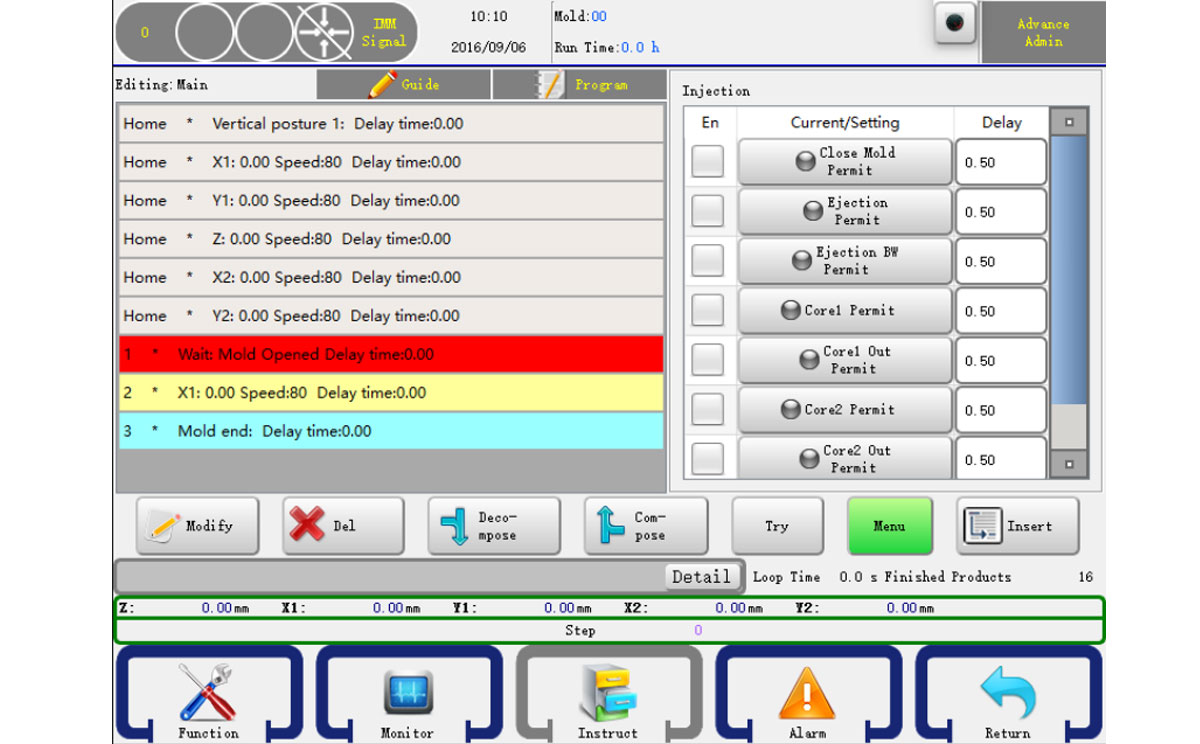
The operation is the same as program fixture action. See 6.2.4.
6.2.6 Auxiliary Action
Click the Auxiliary button to go into periphery action editor, you can find injector, conveyor, reserve point and stack action in this editor, as shown below:
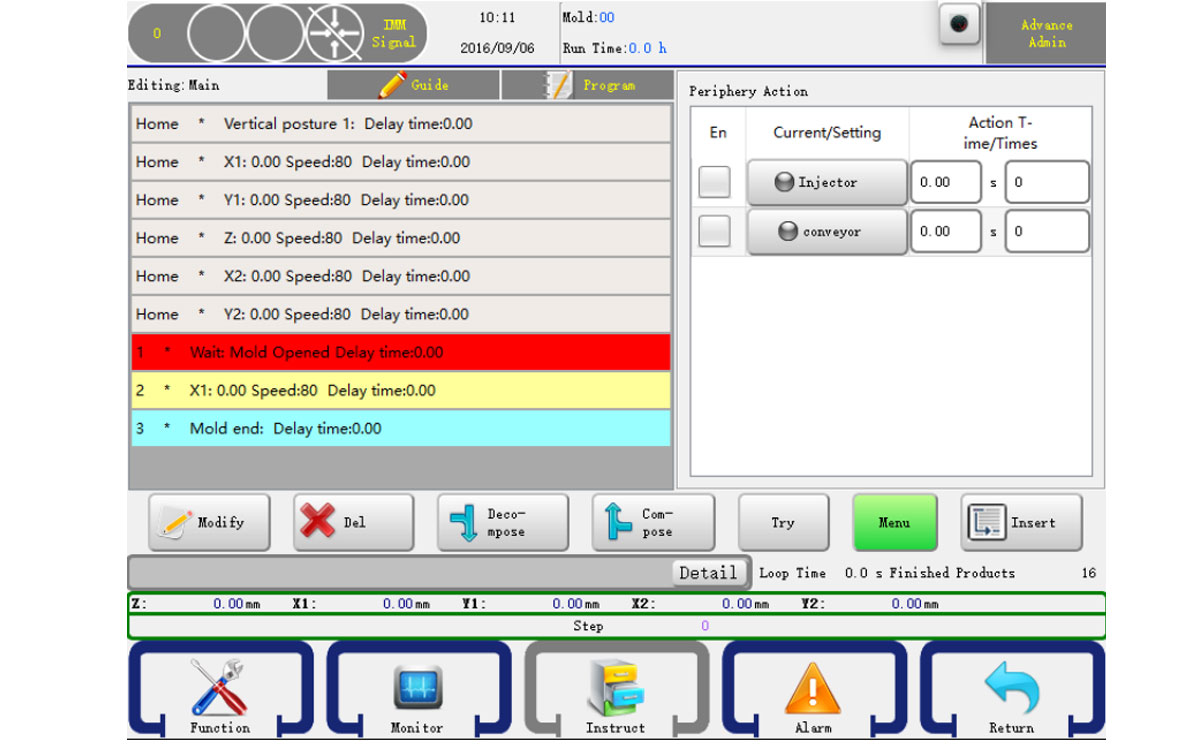
The operation is the same as program fixture action. See 6.2.4
Times: Means how long to execute the action in a cycle.
Delay: Set how many molds in Auto when outpu, maybe every other 1 or two, etc.
6.2.7 Reserve Action
Click the Reserve button to go into action editor. As shown below:
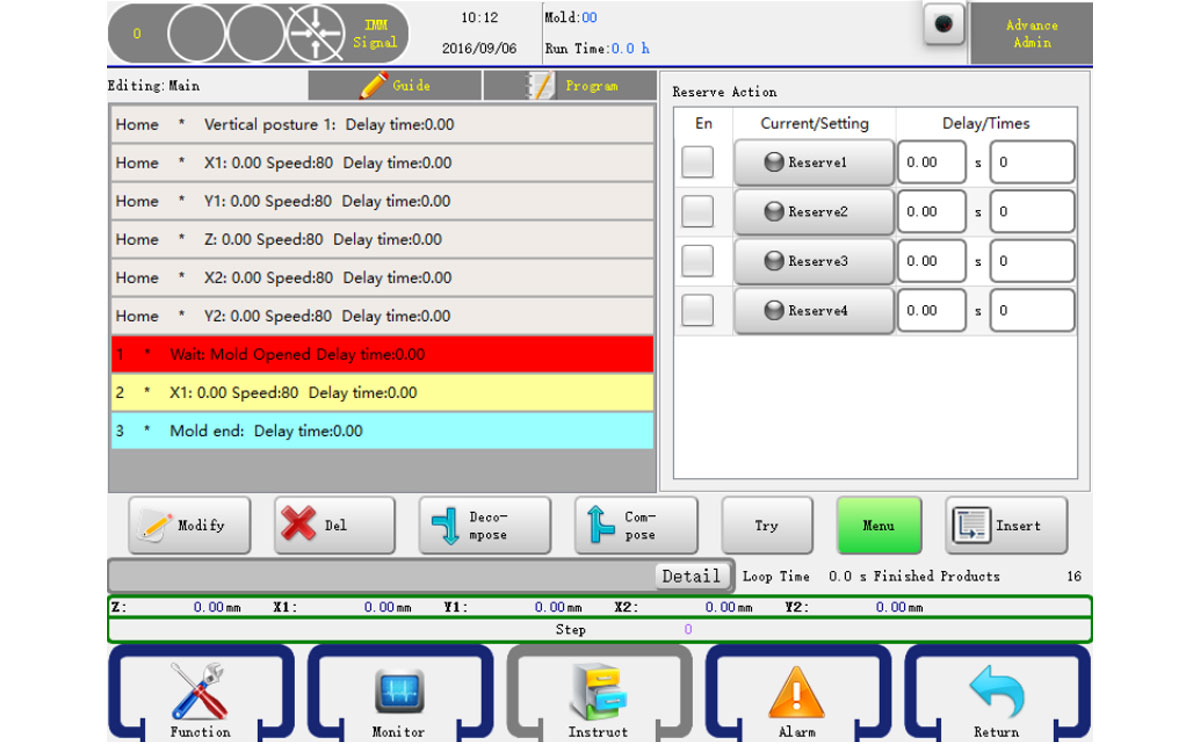
There're four reserves on the system.
Times: Means how long to execute the action in a cycle.
Delay: Set how many molds in Auto when output, maybe every other 1 or two, etc.
6.2.8 Wait Action
Click the wait button to go into wait action editor. This type of action means the program will stop before the input signal you want to wait is on. The editor is as shown below:
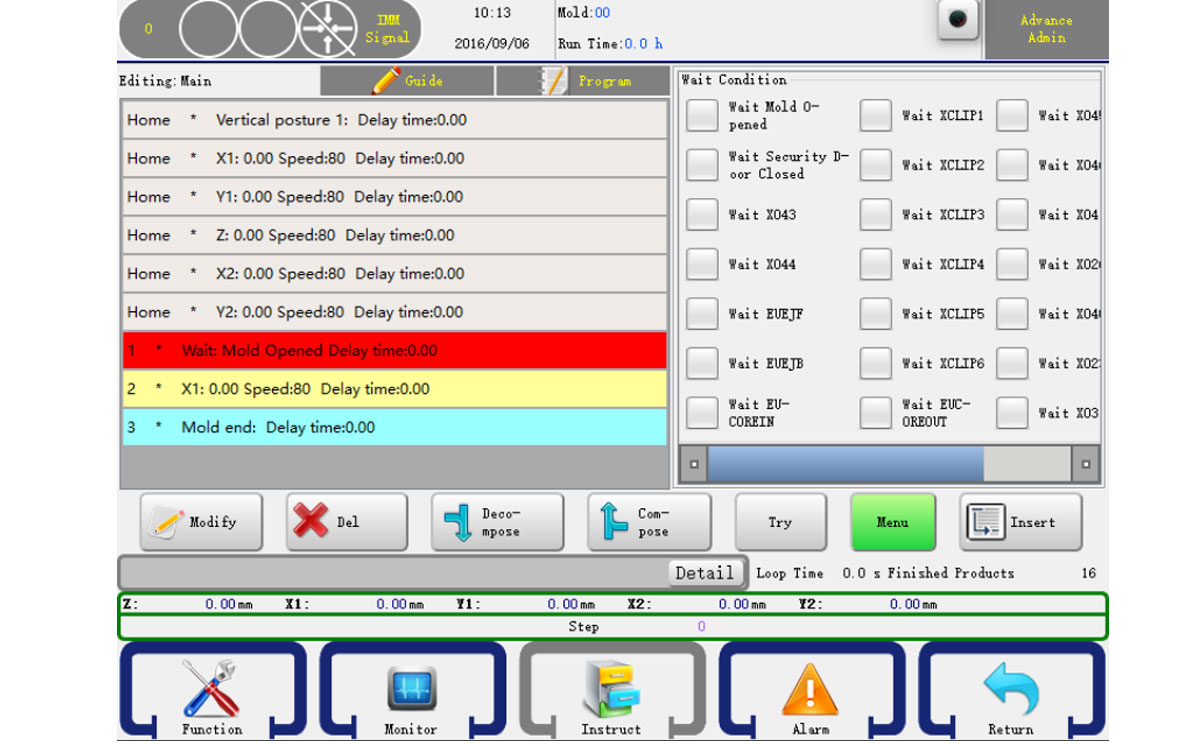
Just check the signal you want to wait and click the insert button to confirm your change.
6.2.9 Comment
Click the Comment button to go into Comment editor. Where you can have some comment on the program.
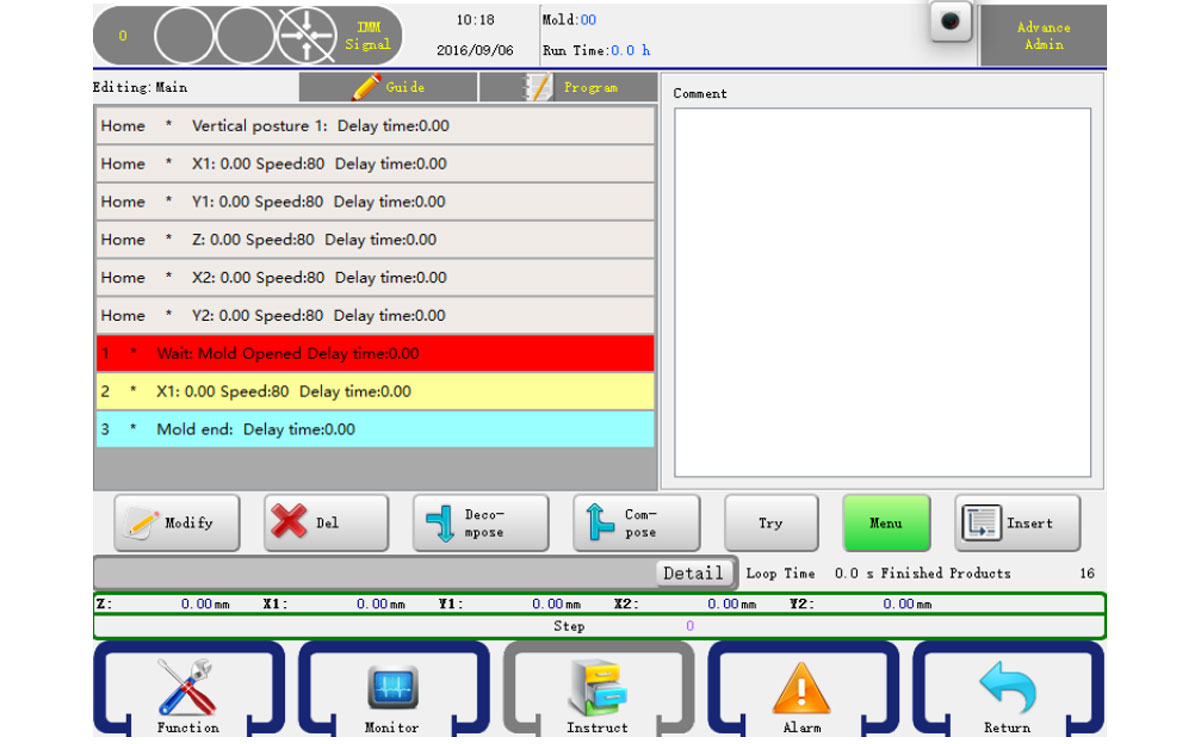
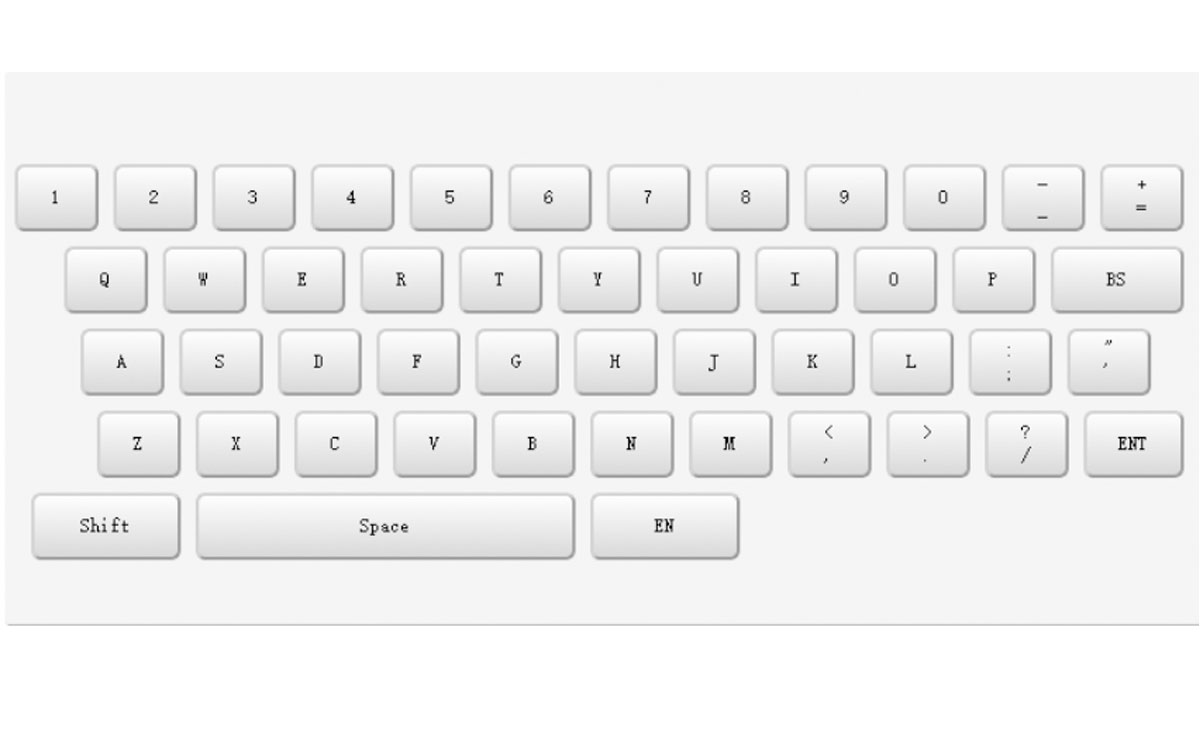
You can use the virture keyboard to input the information.
6.2.10 Conditions
You can also set conditions in your program:
Attention: The program must have a Comment to use the conditions.
6.2.11 Modify Program
Select the step you want to modify and then click the modify button it will open the modify dialog, as shown below:
You can modify the action configure and press OK to confirm.
6.3 Demo
The following procedure will help you to learn and practice robot programming. In the actual mold robot program, depending on your actual situation and set the servo axis position, and setting the correct sequence with the injection molding machine.
6.3.1 Command
The procedure used to pick products and feed tail, the robot stays at the top of the mold injection molding machine and waits for the mold opened signal. When injection molding machine mold opened, arms go down and pick products and the runner, then drop the runner to the crusher, put donw the product to the conveyor, which moving every mold cycle.
6.3.2 Actions
> Turn to auto-mode.
> Arms run to start point waiting for mold opened signal.
> Suck1 for product, fixture 1 for runner.
> Arms go outside injection molding machine, and enable the mold close signal.
> Release runner.
> Put down the product the conveyor and start moving for 3 seconds.
> Arms return to waiting position.
6.3.3 Program
Home X1: 0.0 Speed: 30 Delay time: 0.00
Home Y1: 0.0 Speed: 30 Delay time: 0.00
Home Z: 0.0 Speed: 30 Delay time: 0.00
Home X2: 0.0 Speed: 30 Delay time: 0.00
Home Y2: 0.0 Speed: 30 Delay time: 0.00
Home Vertical Posture Delay time: 0.00
- Wait: Mold Opened Delay time: 0.00
- Y1: 850.0 Speed: 90 Delay time: 0.00
- X1: 400.0 Speed: 90 Delay time: 0.00
- Y2: 850.0 Speed: 90 Delay time: 0.00
- X2: 400.0 Speed: 90 Delay time: 0.00
- Sucker1 On Delay time: 0.00
- X1: 0.0 Speed: 90 Delay time: 0.35
- Y1: 0.0 Speed: 90 Delay time: 0.00
- X2: 0.0 Speed: 90 Delay time: 0.35
- Y2: 0.0 Speed: 90 Delay time: 0.00
- Sucker1 Begin-cut
- Lock Mold On Delay time: 0.00
- Horizontal posture Delay time: 0.00
- Z: 1000.0 Speed: 90 Delay time:0.00
- Y1: 800.0 Speed: 90 Delay time: 0.00
- Y2: 800.0 Speed: 90 Delay time: 0.00
- Sucker1 OFF Delay time:0.00
- Y1: 0.0 Speed: 90 Delay time: 0.25
- Y2: 0.0 Speed: 90 Delay time:0.25
- Conveyor On Times: 1 Action time: 3.00
- Z: 0.0 Speed: 90 Delay time: 0.00
- Vertical posture Delay time: 0.00
- Mold End Delay time:0.00